 Since several people have requested information about the princess cake that I made for my sister's baby shower last month, I have decided to create a blog tutorial. I hope that you find it useful. Feel free to ask any questions, or offer any suggestions that you might have. *Disclaimer: I am, by no means, an expert, so please keep that in mind. :-)
The cake itself has an eight-inch tier on the bottom and a six-inch tier on top. Each tier is about four inches tall with four layers of vanilla cake (colored pink, of course!) and vanilla frosting in each tier. I coated each tier with a layer of buttercream frosting and covered them with white fondant. Several people have asked me what I use for fondant, so if you're wondering, I typically just buy Wilton rolled fondant (from Walmart or Amazon -- usually cheaper at Walmart) or Satin Ice vanilla fondant from Amazon. For me, it is much easier and quicker than making my own.
The Top Tier
 I started by covering the top tier with white fondant. I wasn't worried about the bottom edge being perfect because I knew that it would be covered by the ribbon/bow. Next, I used a quilting tool to create the lines. I have used a rectangular piece of cardboard and a knife/pizza cutter to create a quilted effect in the past, but this tool was much quicker to use. After the lines were in place, I added some sugar pearls where the lines intersected (no pearls are needed on the bottom inch, since that section will be covered), then I set the top tier aside. I should mention that it is easiest to make the quilted lines immediately after you cover the cake with fondant, while it is still easy to mold. If you wait too long, the quilting tool can cause the fondant to crack and it doesn't look good (trust me, I know).
The Bottom Tier
Next, I covered the bottom tier with white fondant (you don't have to worry at all about how this part looks, since it will end up being covered by the ruffles). Then I used rose-colored food coloring to create the darkest ruffle color, and created the bottom row of ruffles. A few people have asked for directions for making the ruffles, so I took some photos that will hopefully help me to explain the process.
Roll a strip of fondant to your desired level of thickness. Initially, I rolled my fondant really thin, and it didn't hold the shape as well, so I ended up making it a little bit thicker. Cut a long strip of fondant (length doesn't matter right now) that is about one inch wide.
Cut the strip into smaller sections (mine were about 3 inches).
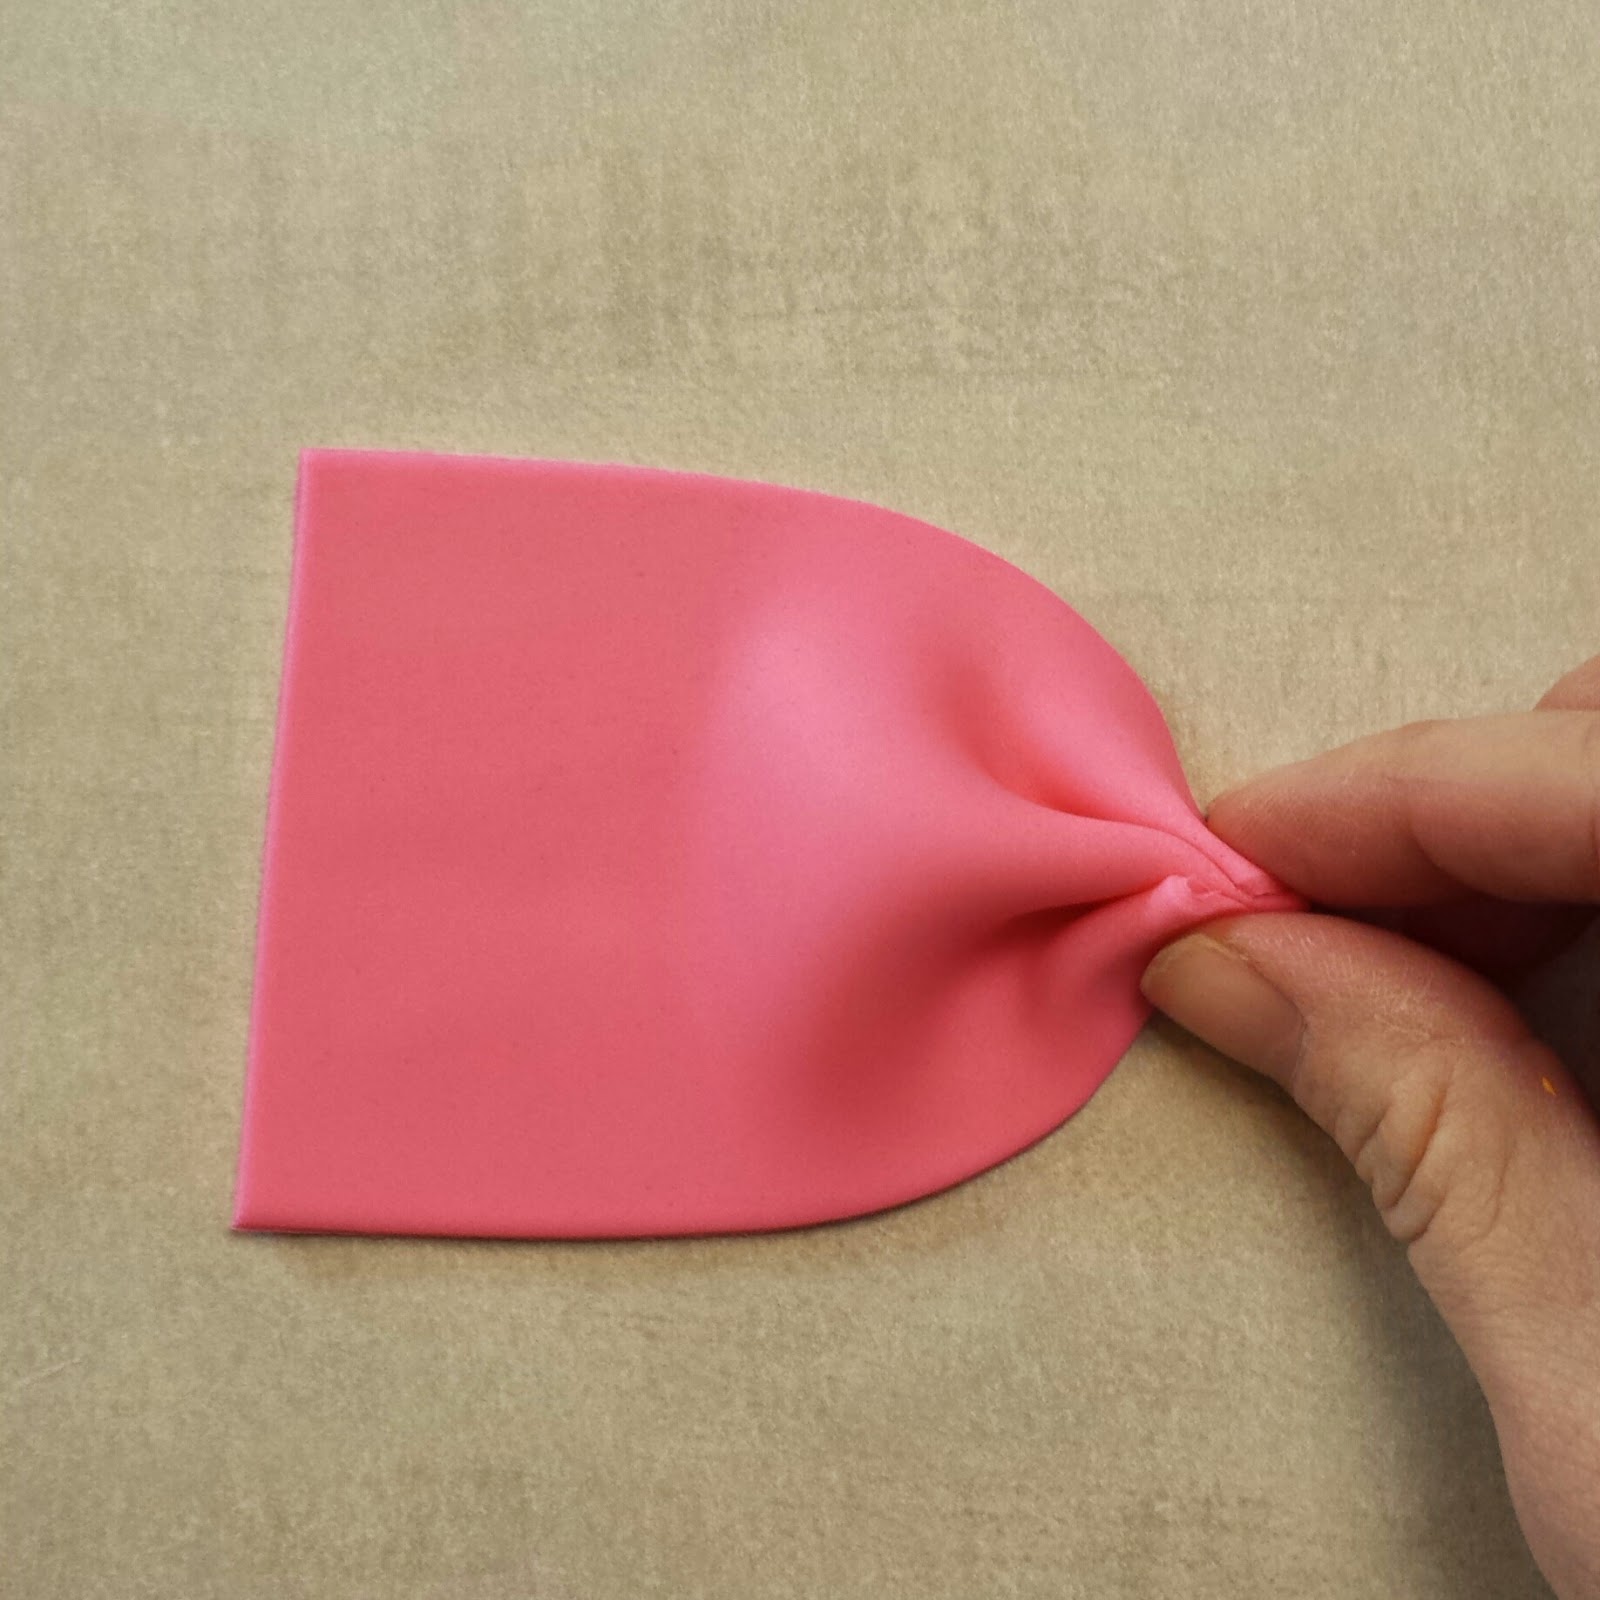
To create the pleats, use your finger and thumbs to create three pleats (or more, if you want) in each strip.
Pinch the pleats together at the top.
Cut off the excess pinched portion at the top of the ruffle so that the ruffle is flat on top.
This is what a finished ruffle looks like:
 Now create as many ruffles as you need to cover the bottom row of your cake. Then use water, piping gel, edible glue, or frosting to attach your ruffles to your cake (I used piping gel mixed with a little bit of water). To create the next row of ruffles, I used the remaining dark pink fondant and mixed it with an equal amount of white fondant, then I did the same thing for the following rows (using the fondant from the previous row and mixing it with an equal amount of white fondant).
If you want to make your ruffles fluff out, you can add toothpicks underneath the ruffles and remove them once the ruffles have had a chance to firm up. Just make sure to remove all of the toothpicks before you eat it, or someone could be in for a big surprise! :-)
After all of the ruffles were attached, I added some dowels to support the top tier, and then I set the top tier on top of the bottom tier. I pushed a long dowel down through the top of the cake (don't worry about the hole... we'll cover it up later).
I used my yardstick to cut a long strip -- about 19 inches, since circumference = π (3.14) x diameter (6 inches), which equals 18.84 inches (and my students think that no one ever uses math in real life). Then I attached the strip to the base of the top tier to create the ribbon border.
The Bow
 No girly cake is complete without a bow, and fondant bows are fun to make! To start, I created the ribbon border by rolling out a long, thin strip of fondant (about an inch wide) and cut it into two pieces to create the "tails" for the bow. I cut the bottom of each piece at an angle, and I pinched the tops to create pleats before attaching them to the cake. I attached them to the part of the cake where the ends of the ribbon border overlapped. Then I made a bow and attached it to the ribbon tails and border. A couple of people have asked me how I make my bows, so I made a bow and took some pictures to create this tutorial. It isn't the bow that I used on the princess cake, but all of my bows are pretty much the same, so I'm sure you'll get the idea. :-)
Roll fondant fairly thin, then cut into two equal rectangles. (This photo might be a little bit deceiving, because I rotated the rectangles 90 degrees in the next image.)
Take one section, and create three pleats using your thumbs and index fingers. Then pinch the pleats.
Do the same thing to the other side of the section so that both sides are pleated.
Flip this section over and add some "glue" (water, piping gel, etc.) to one side. Then fold it in half, pressing the pleats from each side together. Take the other rectangular piece of fondant and create the other half of the bow in the same manner.
Use rolled pieces of paper towel to make the bow as full as you want it to be. Then cut away the excess pieces from each half of the bow, and glue the halves together.
Roll out a small piece of fondant to create the center of the bow (it doesn't have to be very neat). Then fold the edges over to make it moderately straight.
Turn it over and pinch both ends together. Then add some glue to the middle of your bow and place this piece onto the center of the bow. Cut away the excess.
At this point, you can either add the bow directly to your cake, or you can wait a couple of hours for it to firm up a bit. Once it seems stable, remove the paper towel and admire your hard work. Okay, so maybe it wasn't super hard work, but it still looks nice, right?
The Top of the Cake
 The top of the cake is the easiest part... probably because I didn't end up having to make a tiara out of fondant/gumpaste this time. I bought this tiara from Amazon for a couple of dollars, and it happened to fit perfectly on top of this six-inch tier (I just cut off the hair picks). To cover the top of this cake, I rolled out a piece of dark pink fondant and cut it into a five-ish inch circle. Then I attached the circle to the top of the cake (which covered the hole that I made with the dowel). Next, I rolled out a long, thin, one-inch-wide strip of fondant to create the ruffle. I attached it to the circle, bunching it up as I went along. Then I did the same thing with a lighter pink strip of fondant. Lastly, I added the tiara, and voila! We're done!

 To start, I made a four-layer six-inch cake and covered it with fondant (this cake is chocolate with raspberry filling). It doesn't need to be perfect at this point because it will be almost completely covered with "billows." If you're wondering about the color, it's Wilton's teal gel food coloring, and it only took a little bit to achieve this color.




.jpg)


